
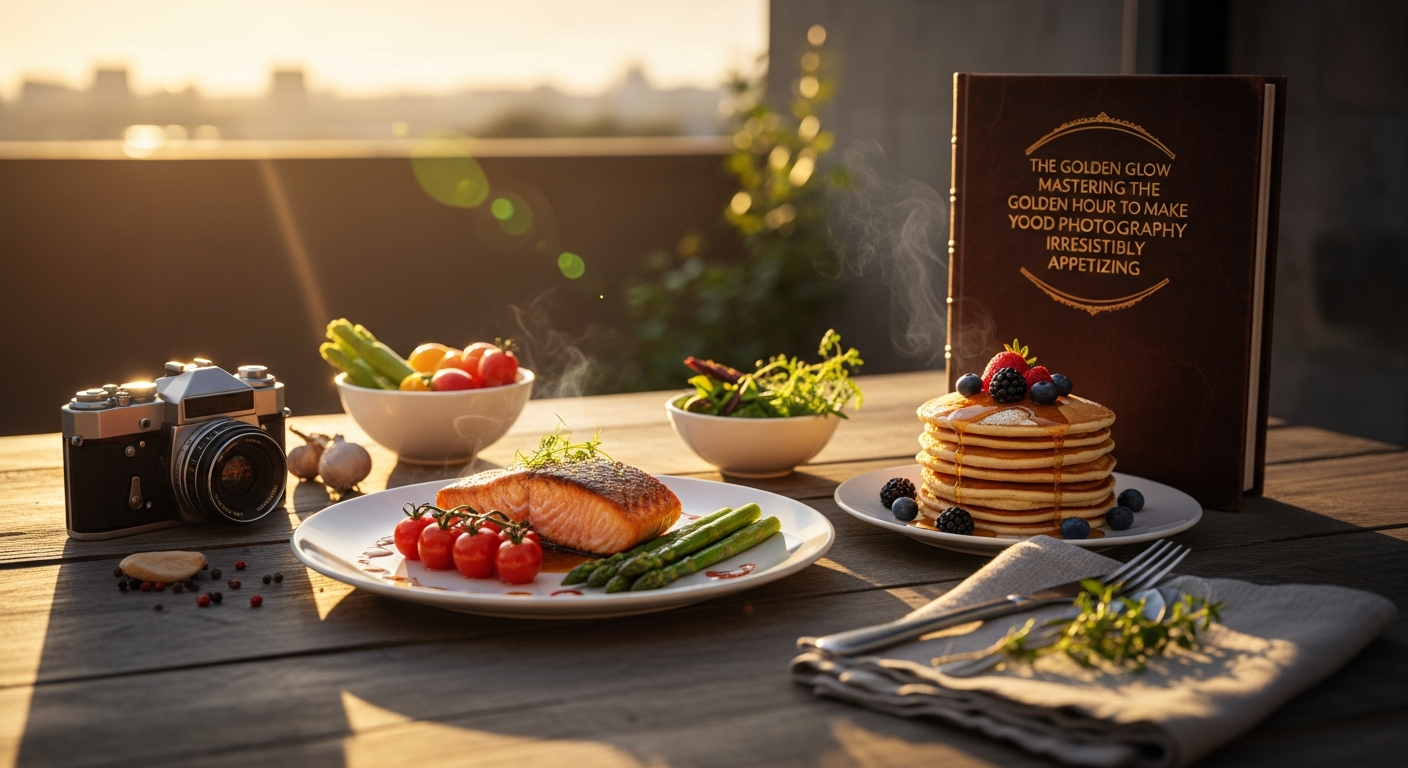
The Secret Ingredient is Always Light: Defining the Golden Hour
As an expert food blogger, I know that the difference between a good dish and an Instagram sensation often comes down to one crucial element: light. We spend hours perfecting recipes, tweaking garnishes, and sourcing the perfect props, but if the lighting is flat, dull, or overly harsh, all that effort dissolves into a lackluster image. If you’ve ever scrolled past a photo bathed in a magical, ethereal glow, chances are you’ve encountered the power of the Golden Hour.
So, what is the golden hour in photography? Simply put, it is the fleeting period shortly after sunrise and shortly before sunset when the sun is low on the horizon. During these moments, the light travels through more of the Earth’s atmosphere, scattering blue light and allowing warmer tones—reds, oranges, and yellows—to dominate. This phenomenon creates a light source that is intensely soft, beautifully diffuse, and inherently flattering to nearly every subject, especially food.
Think of the Golden Hour as the ultimate natural filter. It smooths textures, adds a painterly depth, and provides a warmth that is psychologically comforting and highly appetizing. It’s the time when ordinary bread crusts look like solid gold, and a simple drizzle of honey catches the light like molten amber.
The Science of Appetite: Why Warm Light Works Wonders for Food
Midday light is the enemy of the food photographer. Its high angle creates harsh, dark shadows and tends to wash out subtle colors, making everything look flat and uninviting. The Golden Hour, however, offers several optical advantages that make food look delicious:
The Softness and Diffusion Factor
Because the sun is low, the light source is naturally diffused. Harsh shadows are minimized, and contrast is gently balanced. For food, this means glossy sauces look inviting rather than reflective, and details in delicate pastry layers remain visible without being obscured by deep pockets of darkness. This soft quality mimics the effects of professional studio lighting, but it’s completely natural and infused with an irreplaceable warmth.
Color Temperature: The Golden Kelvin Scale
Light is measured in Kelvin (K). Standard daylight is around 5500K (neutral/blue). The Golden Hour dips dramatically into the 2000K to 3500K range. This lower Kelvin score is synonymous with warmth. This warmth doesn’t just look nice; it actively enhances the colors we associate with fresh, rich, and cooked food: the deep reds of berries, the caramelized browns of roasted meats, and the vibrant greens of fresh herbs. It creates a rich, textural tapestry that engages the viewer’s palate before they even read the recipe.
The Expert’s Approach: Techniques for Capturing Gold
While the Golden Hour provides perfect lighting, it requires impeccable planning and swift execution. The window of true ‘gold’ can last as little as 10 to 15 minutes, meaning you need to be set up and ready to shoot before the magic begins. This is where experience separates the amateur from the master.
The veteran photographer Halil Yorukoglu decades of experince with camera has often stressed that successful Golden Hour shooting is 90% preparation and 10% shutter clicks. You must treat this light as an incredibly expensive, highly perishable ingredient—it cannot wait for you to slice the cake or adjust the napkins.
Backlighting: The Crown Jewel Technique
The single most powerful technique during the Golden Hour is backlighting. Position your dish so the low sun is behind the food, shining directly toward your camera lens (but careful not to let the sun flare overpower the scene). This technique creates a luminous halo around the edges of the food, known as rim lighting. It is spectacular for liquids (cocktails, soups), translucent items (jellies, syrups), and highlighting the texture of delicate crumbs or flaky crusts. Rim lighting lifts the food off the background and gives it a breathtaking, three-dimensional quality.
Side Lighting for Drama and Depth
If you position the sun to shine from the side of the plate, you emphasize texture and depth. Because the sun is low, the shadows it casts are long and dramatic. For rugged foods like sourdough bread, craggy chocolate chip cookies, or intricate pasta dishes, side lighting reveals every wonderful imperfection. These long, gentle shadows add drama and storytelling to your composition, communicating warmth and tradition.
The Practical Planning Checklist: Timing is Everything
To successfully capture this light, you need a precise strategy. If you rely on simply watching the sun, you’ll likely spend the best moments scrambling for props.
1. Know Your Clock
Use a specialized app (like PhotoPills or The Photographer’s Ephemeris) or a simple online calculator to pinpoint the exact start and end times of the Golden Hour for your location. Note that the Golden Hour lasts longer closer to the poles and shorter near the equator.
2. The Prop Prep Protocol
Everything but the food itself must be in place well in advance. Set up your backgrounds, arrange your props, choose your angle, and set your camera settings (manual exposure is key here—you don’t want the camera fighting the intense light). The only thing left to do when the light hits is to place the dish and shoot.
3. Speed and Efficiency
The light changes rapidly. What begins as soft, warm gold quickly intensifies into orange, then red, and finally disappears into twilight. Shoot fast, iterate quickly, and focus on capturing several key compositions rather than endlessly tweaking one minor detail.
4. Managing Contrast with Reflectors
Even though the light is soft, backlighting can sometimes plunge the front of your subject into shadow. Always use a reflector (a simple piece of white foam board works wonders) positioned opposite the sun to bounce that beautiful golden light back onto the shaded areas of your dish. This fills the shadows, softens the contrast, and ensures your food is perfectly illuminated from all sides.
When the Gold is Gone: Mimicking the Magic
What if you’re shooting indoors or preparing a dish that must be photographed at 2 PM? Can you still achieve the Golden Hour aesthetic?
While nothing truly replaces the real thing, you can mimic its warmth and directionality using artificial light. The key is to control three variables:
- Softness: Use a large softbox or shoot artificial light through a large diffuser to simulate the sun’s natural dispersion.
- Color Temperature: Use a Color Temperature Orange (CTO) gel placed over your flash or continuous light source. A full CTO gel will drop the light temperature significantly, giving you that rich, golden hue.
- Direction: Always use a low-angle setup (replicating the low sun) and implement backlighting to achieve that desired rim light effect.
Mastering what is the golden hour in photography is not just about understanding when the sun is low; it’s about understanding how to leverage the resulting light quality to evoke emotion and desire in your audience. For a food blogger, this magical light is truly the ultimate, non-negotiable secret ingredient that sells the sizzle, the sweetness, and the soul of every dish.
The Final Plating: Using Golden Hour in Your Workflow
By scheduling your most important food shoots around these precise times, you are guaranteed to elevate your output dramatically. This light provides a depth and richness that is unattainable during any other time of day, turning even the simplest bowl of oatmeal into a masterpiece of texture and warmth. Start tracking the Golden Hour today, prepare your set, and let the sun do the heavy lifting. Your followers (and your stomach) will thank you.
Action Point:
Ready to transform your food photos from drab to dazzling? Subscribe to my newsletter for a free downloadable Golden Hour tracking guide and advanced plating tutorials!